So, a very fast recap.
I'm a musician, moderately good. Play piano, sing and, importantly for this blog, am a classical organist who didn't practice due to access to pipe organs. I found a computer programme called 'Hauptwerk' and was immediately bitten by the bug to build my own virtual pipe organ. I started off with one, then two manuals then plus a pedalboard then three and eventually four. However, I'm now at the stage where this monster has been created. Always wanting more, that's me.
The build project has been going on now since Captain Cook was a sea cadet and I've decided today to stop pretending that it'll ever be finished. Whenever I think that the end's in sight, I think of something else that I can do to add to it and off it goes again.
During the last 9 months or so, I've had a lot of time on my hands due to being incapacitated and unable to attend work. Don't worry, nothing very bad but what it did give me was TONS of time to get going with the organ.
I did quite well in the early part of the year building the casework but then gradually ground to a halt as I really didn't know what I wanted to do with it although I knew I wasn't finished. The big job I'm dreading is doing the finishing lacquer work. It'll take FOREVER so perhaps I'm subconsciously putting off ever doing it.
This last couple of weeks I've had my head down below the keyboards and have concentrated on the nether regions (couldn't resist).
The idea was to butch up the legs to make the thing look much more sturdy. Although the legs were doing a fine job, they did rather look unfinished. I wanted to have the legs looking much more robust. This is what I ended up with...

Clearly the photo shows it in an unfinished state but it gives a really good insight into how it is put together. The inside of the panel that you see is actually the leg itself. The rest has been clagged on top of it. The frame is simply four bits of veneered mdf glued on around the edge. No need to mortise or anything like that as it is decorative. The black inside edging is 18mm stripwood from B&Q that I spraypainted gloss black and cut to size. The bottom skirting was slightly more complex but barely. To have it further out there was plain mdf behind it to make up for the depth of the new panel edges. Trusty old can of spray paint (lots of them too - I'm on number 4 and counting) and the mitre saw to give the edges and corners and you're pretty much there. This next picture shows how it looked when it was finished.

The front of the leg detail was courtesy of good old B&Q again for some decorative moulding and spray paint. The pieces at either side of that are offcuts of solid maple. The whole setup not only looks good but hides forever, the raw and very unattractive edges of the mdf. What started out being 18mm thick is now, measuring at the skirt 9cm. It now does indeed have a much more solid appearance.
Clearly, the design carried on around the corner, look!

This picture handily shows off a few other things. Firstly, I led the line right on to the separate unit of the toe stud rail. I still want it to be separate for maintenance reasons. This proved a little tricky but in order to get that out I ensured I was able to remove the skirting and lower portion of the panel. Yes, they do have to be held in by screws but big deal: that can easily be tidied up after all.
Do you notice the colour of the pedalboard? Not good is it? I thought not anyway.
I've been meaning to respray the pedalboard for ages and finally, when I got around to doing it last week, it had such gratifying results very quickly indeed.
Here's how it was when it was partly disassembled in anticipation of a paint job;-
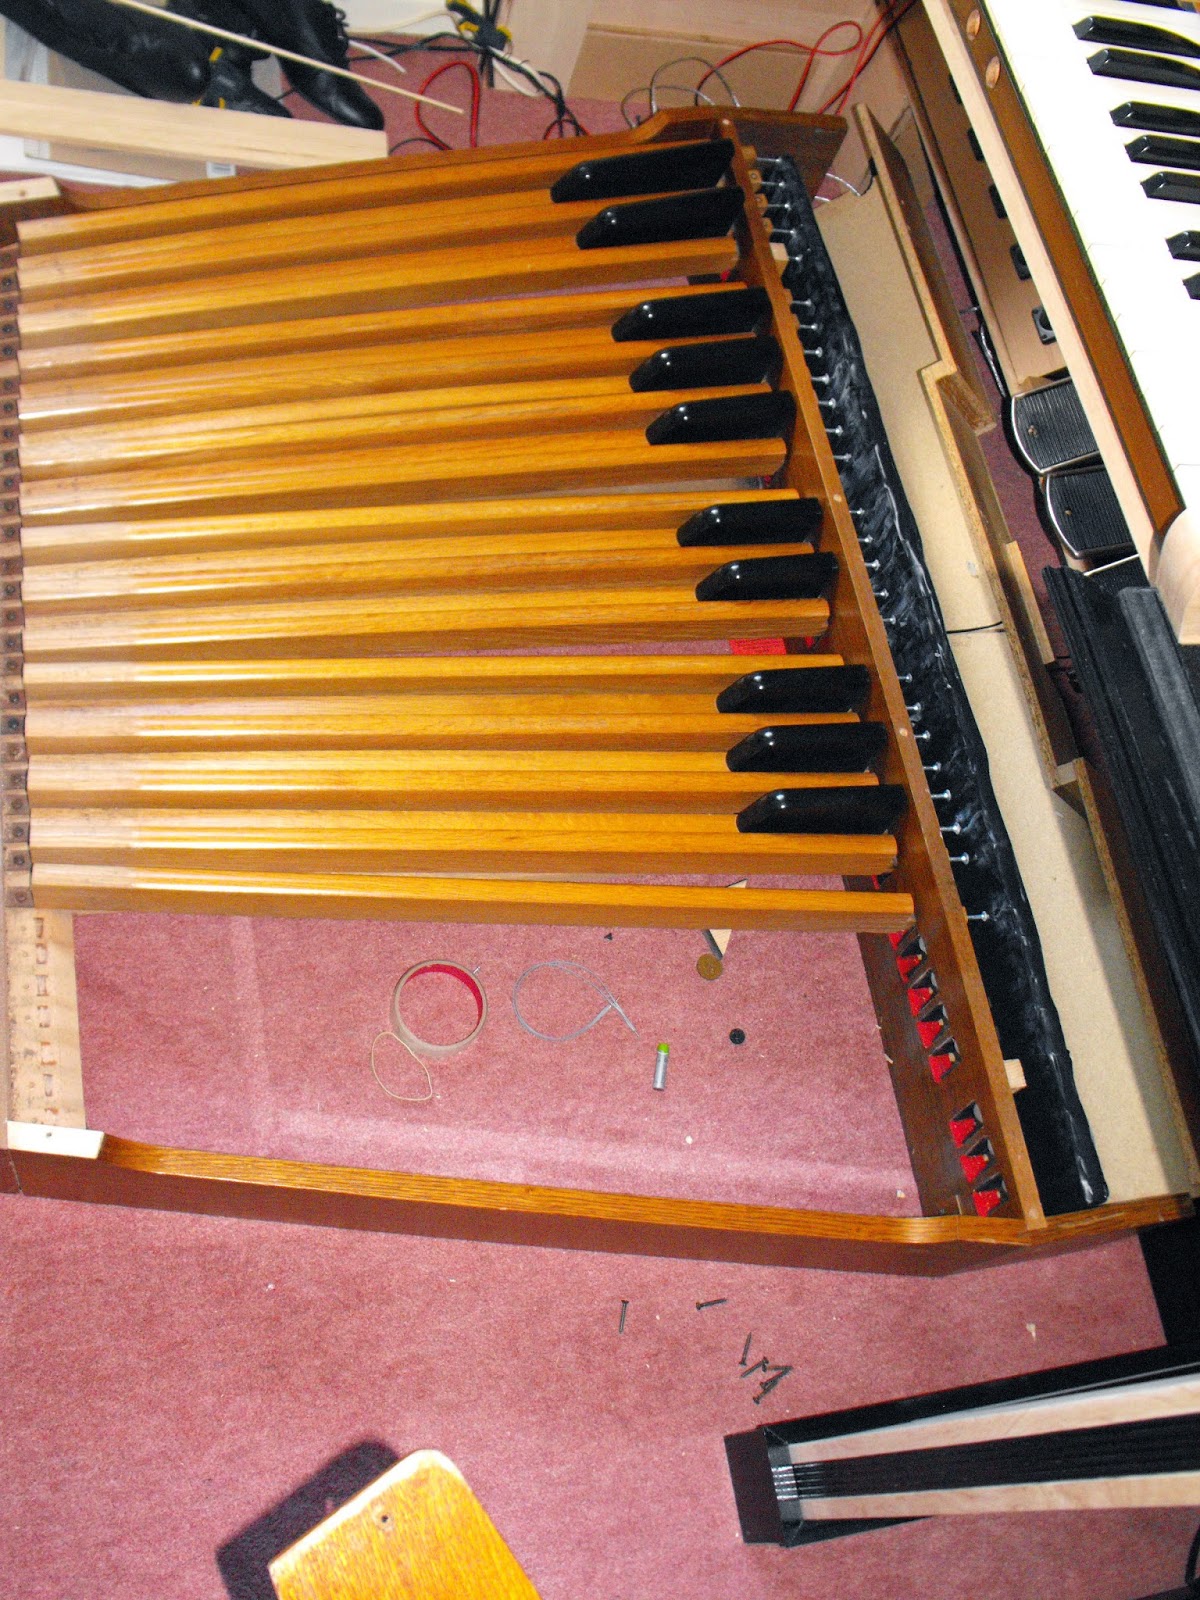
Do you notice the detritus that had fallen through the pedals? I guess it's always worth pulling them out occasionally if you're looking for lost pens, pencils, staples, money, sellotape, escaped convicts, missing children or bankers' ill-gotten-gains from money laundering. It's surprising what you find under there!
Here is the frame outside being repainted...

Shame I didn't do the same to the railing up to the kitchen door while I was at it!
This part of the project was very gratifying indeed. Painting something black has instant results. I loved how the felt on the pedal bushings really shows up. And now, here it is all back together. Very nice, I'm sure you'll agree.

There's lots more to follow but to be honest, I need to have a bath and it's already midnight!